CRIMPING CABLE
CRIMPING STRAIGHT CABLE
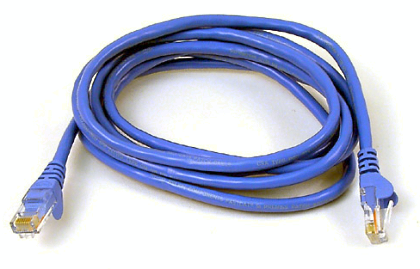
A network cable acts as an extension enabling a device with a Network Interface Card to be attached to a network. A common form of network media is the UTP CAT 5 known as Unshielded Twisted-Pair Category 5 cable.
ITEMS FOR MAKING STRAIGHT CABLE
CAT 5 CABLE
CAT 5 cable has four twisted pairs of wire for a total of eight individually insulated wires.
Each pair is colour coded with one wire having a solid colour:
Blue , Orange, Green, Brown
RJ-45
The straight cable is terminated with CAT 5 RJ-45 (Jack) modular plug (RJ means Registered Jack).RJ-45 plug are similar to those you'll see on the end of your telephone cable except they have eight contacts on the end of the plug and they are about twice as big.
CRIMP TOOL
Crimp tool - to crimp RJ-45 connectors.
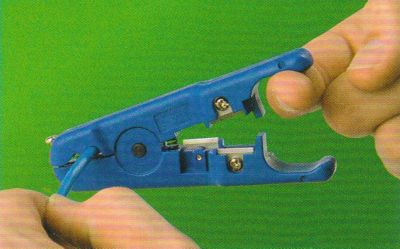
CABLE STRIPPER
Cable stripper – to cut and strip cables.
CUTTERS
Cutters - to cut the cable off at the reel and to fine tune the cable ends during assembly.
CABLE CRIMPING PROCESS
- The total length of wire segments between a PC and a hub or between two PCs cannot exceed 100 Meters.
- Strip one end of the cable with the stripper or a cutter.
- If you are using the stripper, place the cable in the groove on the blade (left) side of the stripper and align the end of the cable with the right side of the stripper.
- Spread and arrange the pairs roughly:
White/Green, Blue
White/Blue, Green
White/Brown, Brown
White/Orange, Orange
- Trim the ends of the wires so they are even with one another.
- It is very important that the unstripped or untwisted end be slightly less than half-inch long.
- If it is longer than half-inch it will be out of its specifications and will cause crosstalk.
- If it is slightly less than half-inch long, it will not be properly clinched when RJ-45 plug is crimped on.
- There should be little or no space between the wires.
- Hold the RJ-45 plug with the clip facing down or away from you.
- Push the wire firmly into the plug.
- Looking through the bottom of the plug, the wire on the far left side will have a white background
- The wires should all end evenly at the front of the plug.
- Hold the wire near the RJ-45 plug with the clip down and firmly push it into the front-left of the crimper.
- Hold the wire in place and squeeze the crimper handles quite firmly.
- Crimp it once.
- Finally test the crimping result.
- Test the crimp strength.
- If it is done properly, an average person will not be able to pull the plug off the cable with his or her bare hands.
CRIMPING CROSSOVER CABLE
This cable can be used to directly connect two computers to each other without the use of a hub or switch.
TOOLS FOR CABLE CRIMPING
What you need are some tools such as a cable, connectors, crimper, stripper and cutter. Be sure the cable you are using is properly rated for CAT 5.
Crossover cables are terminated with CAT 5 RJ-45.
STRIPPING CATEGORY 5 CABLE
Start by stripping off about two inches (5cm) of the plastic jacket off the end of the cable.
CATEGORY 5 CABLE
Category 5 cable must only have half of an inch (1.3 cm) at the end.
CUTTING CATEGORY 5 CABLE
Begin to untwist the twisted exposed wires on your cable, be sure to hold onto the base of the jacket with your other hand.
Once you have all the wires untwisted begin to arrange them in the proper order:
White/Green, Green
White/Orange, Blue
White/Blue, Orange
White/Brown, Brown
Once you get all the wired arranged in the proper order, make sure your wire cutters are within reach then grasp at the point where they enter the jacket.
Grab your cutters now. Line them up along your prepared wires about half an inch or 1.3 cm above the jacket.
Be sure at this point that you are both half an inch or 1.3 cm above the jacket, and that your cutters are aligned straight across the wires.
FITTING RJ-45 PLUG
Take RJ-45 plugs and begin to slide the wires into the RJ-45 plugs.
You might face some difficulties at this point, but have some patience and hold onto those wires.
It will fit in there just fine. Once it is in as far as it will go the wires should extend almost to the front of the RJ-45 plugs, and about 3/8 of an inch or 2 cm of the jacket will be inside the RJ-45 plugs.
CRIMPING CATEGORY 5 CABLE
Be sure to keep a good grip on the RJ-45 plug and the cable.
Insert the RJ-45 plug into the crimper.
It should only go in one way, so you don't have to worry about inserting it.
Begin to compress those crimpers.
You will hear a clicking sound. Keep squeezing.
If you try to let go too early, nothing will happen. They will not release.
Keep compressing until they stop clicking or stop moving all together.
At this point, you should be able to let go of the RJ-45 plug and the crimpers.
EXAMINING THE CRIMPED CATEGORY 5 CABLE
If you look at the end of the RJ-45 plug, you should see that the copper connectors should not be pressed down into the wires.
Toward the back of the RJ-45 plug it should be crimped securely holding the jacket or cable in the RJ-45 plug.

 ICT is the technology required for information processing, in particular,
the use of electronic computers, communication devices and software applications to convert,
store, protect, process, transmit and retrieve information from anywhere, anytime.. [...]
ICT is the technology required for information processing, in particular,
the use of electronic computers, communication devices and software applications to convert,
store, protect, process, transmit and retrieve information from anywhere, anytime.. [...] A computer system is defined as combination of components designed
to process data and store files.A computer system consists of four
major hardware components; input devices, output devices, processor and storage devices.. [...]
A computer system is defined as combination of components designed
to process data and store files.A computer system consists of four
major hardware components; input devices, output devices, processor and storage devices.. [...] A computer network is a system of interconnected computers and peripheral devices. In a network, computers can exchange and share information and resources.. [...]